Site Themes
The site themes function manages which themes are assigned and which theme panel designs are used on specific terminals. It allows configuration of default panels, those automatically displayed when a POS operator logs on and provides options to change these defaults based on the time of day. This page explains how to set up and manage this section.
Site Themes Topics
Allocating Sites to Themes
Follow these steps to allocate sites to themes:
-
From the Select Theme drop down choose which theme is to be assigned
This step is only required if there are multiple themes configured -
Assign sites to the theme by clicking the Arrow Buttons, so that they move to the right into the Sites in Theme list
Any new sites must be added to the theme before being able to assign their panel designs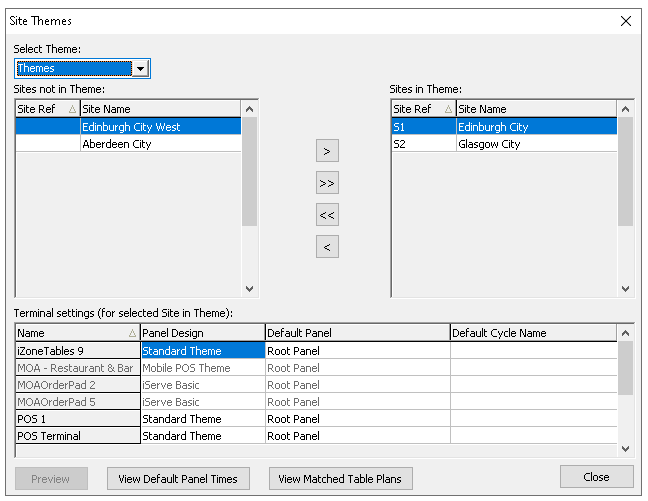
Terminal Settings
Follow these steps manage terminal settings:
-
Select the required Theme from the Select Theme drop down (optional)
-
Select the required Site from the Sites in Theme list
-
For each terminal listed selected the required Panel Design from the drop down
If the expected panel design is not shown the site has been allocated to the wrong theme, move the site back to the sites not in theme list and update against the correct theme -
Select the required Default Panel from the drop down for each terminal (optional)
The default panel list will be automatically assign the 'Root Panel' but an alternative can be selected which include local panels (those created in the theme) and any theme table plans, when assigned the POS operator will be presented with this upon login to the terminal
Default Panel Times
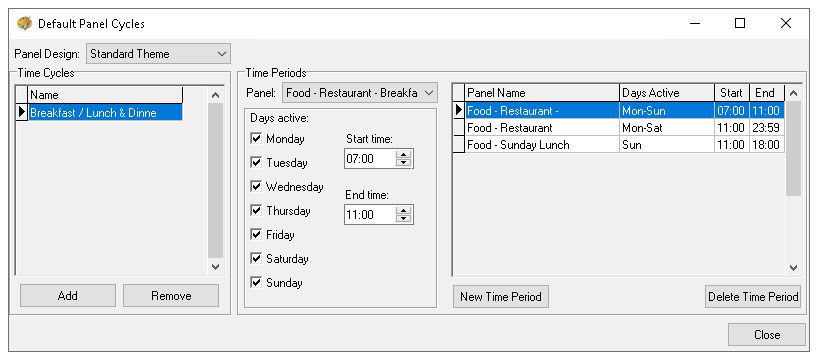
The default panel times feature allows you to configure, for each theme panel design, which panel is displayed to the POS operator based on the day and time with the flexibility to apply multiple changes throughout the day.
Follow these steps manage terminal settings:
-
Click View Default Panel Times
-
Select the Panel Design from the drop down
-
Click Add to create a new Time Cycle
-
Enter the Cycle Name | click OK
-
Click New Time Period
-
Select the required Panel from the drop down and complete the following settings
-
Days Active
-
Start Time
-
End Time
Add further time periods or time cycles to meet the organisations requirements
-
-
Click Close
-
Assign the Time Cycle to the relevant themes, sites and terminals
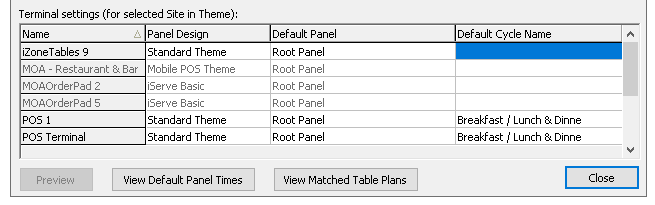 If required clicking 'Preview' will enable a check of a selected terminal
 -
Click Close